
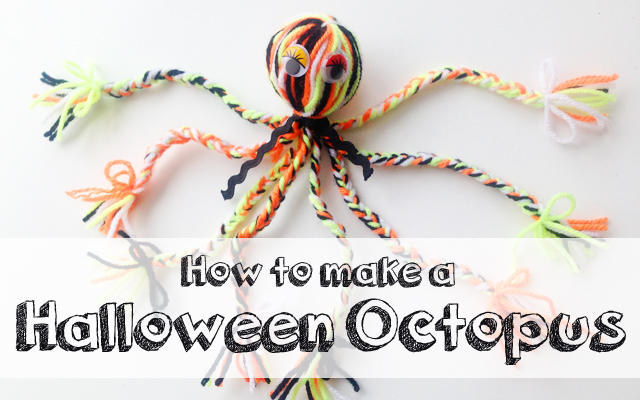
Yes that’s right, a Halloween OCTOPUS! I had a stash of wool and some stick-on eyes and made this little creation.
What you need is wool (in orange, neon yellow, black and white), stick-on eyes, kitchen foil, black ribbon, cardboard (approx 30cm long) and some scissors.

Here are the steps:
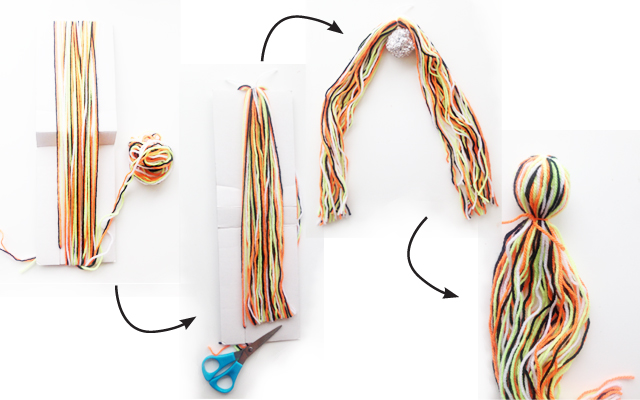
- Snip a cut in the cardboard where you can attach the end of the wool. Then wind the wool round and round the card about 40 times
- Put a piece of wool under the wound wool at the top and tie together. Then cut through the wool at the bottom.
- Scrunch up a ball of foil, and put the ball under the wool.
- Spread the strands of wool around the ball and tie up at the bottom.
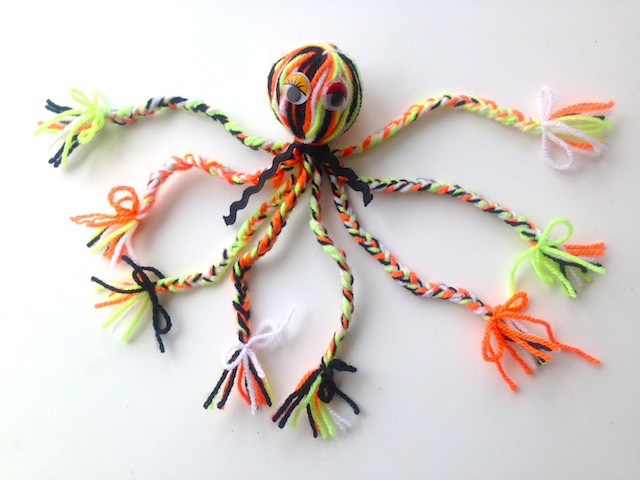
5. Next split the wool into 8 sections and starting plaiting! Tie each one in bow.
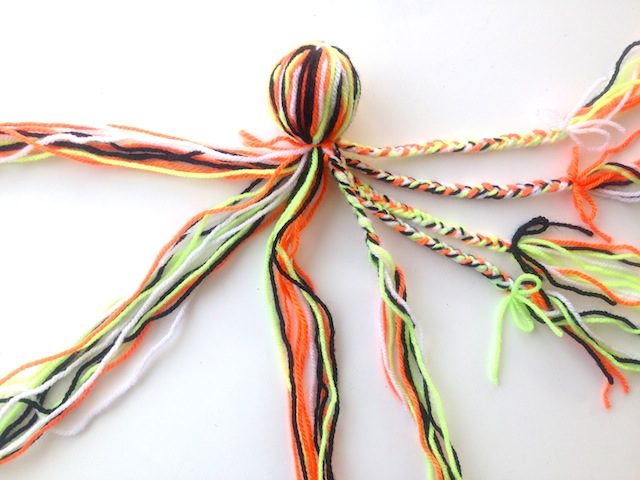
6. Tie black ribbon around the neck, stick on the eyes and hey presto – you have a Halloween Octopus!
I would say this is more of a mummy activity than a toddler one, but Tyler did help me stick the eyes on! Why don’t you have a go if you have some left-over wool?
Sabrina x


what a fab idea! we will defo need to do something like this with Elliott! Thanks for sharing! beautiful photo! Suz x Beauisblue.com
LikeLike
Oh yes do have a go, it’s a really fun activity. Well I enjoyed making it, Tyler just plays with it now! xx
LikeLike
Pingback: Halloween Craft with Bostik | The Mummy Stylist·